May 09, 2020
Application built with React and NodeJS, data stored using MongoDB and deployed online using Vercel (now.sh).
Application available live at https://blog-frontend.abdullahibneat.now.sh/ (frontend) and https://blog-backend.abdullahibneat.now.sh/ (backend), and source code available on GitHub: frontend / backend
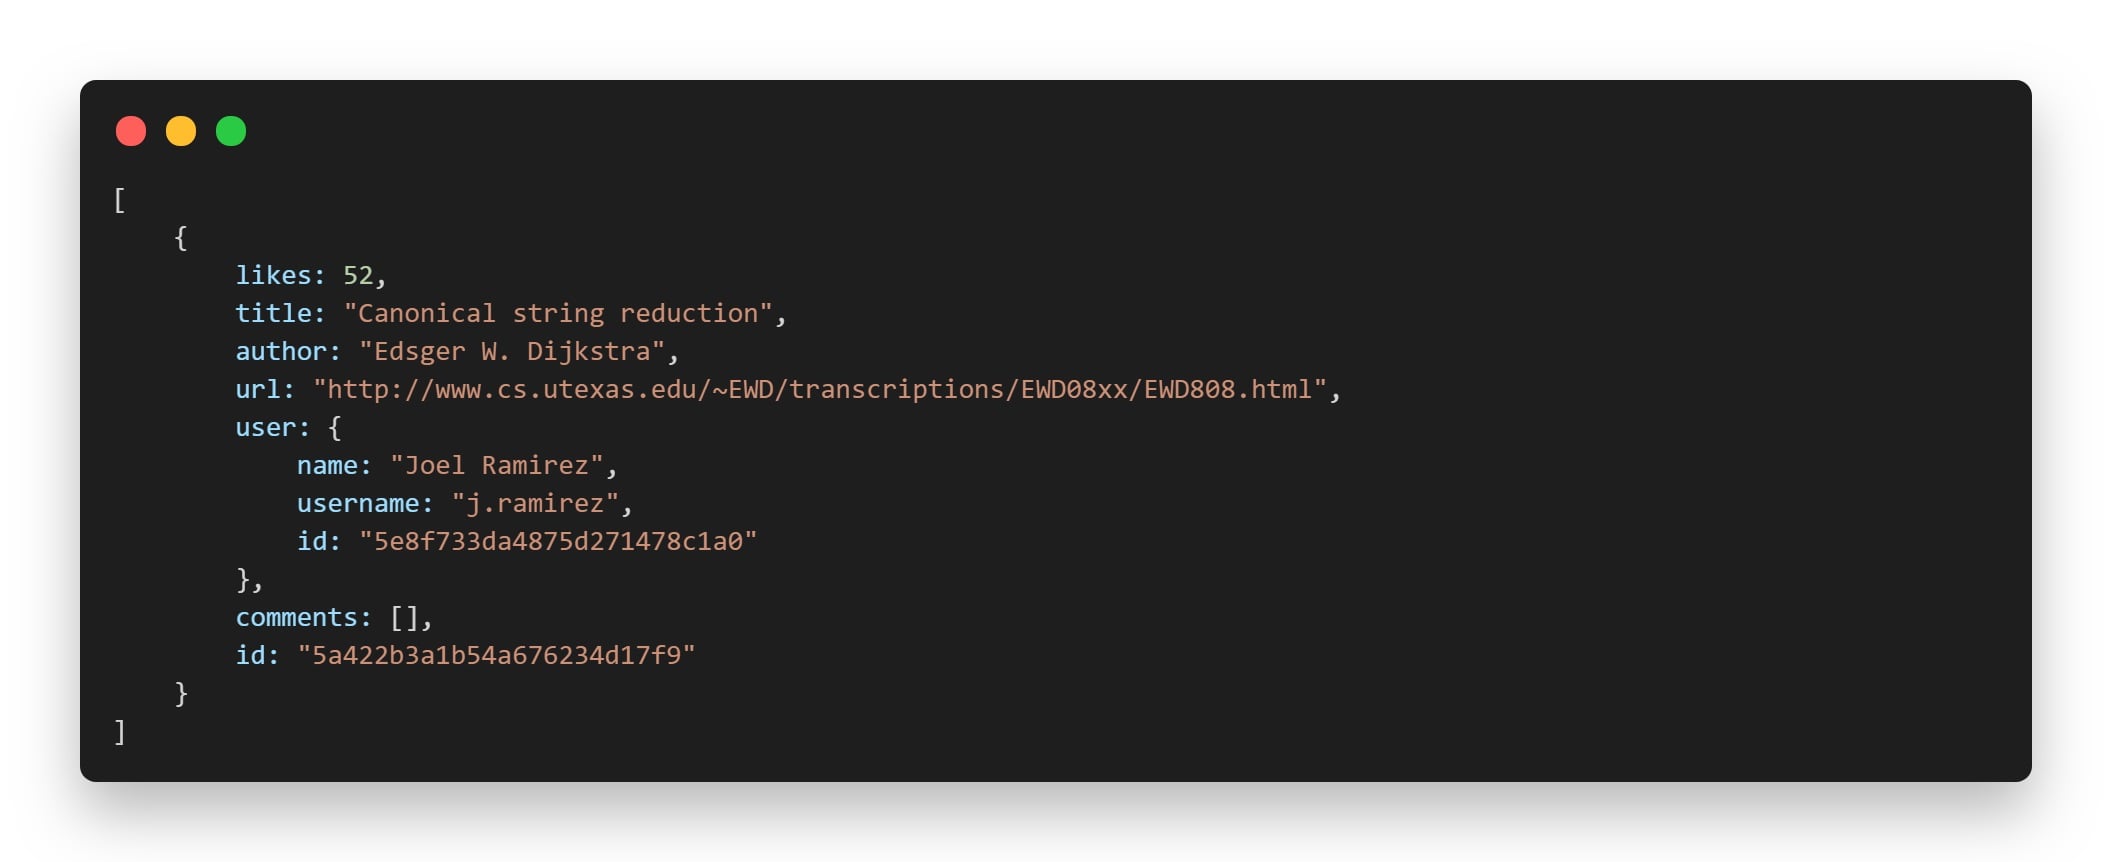
“Blog list” was an independent exercise developed as part of the FullStackOpen challenge. The application allows authenticated users to share links to blog articles, which are stored in a MongoDB database and can be accessed through an Express-based API.

This application was built in a progressive manner to grasp different concepts of React and NodeJS. First, I started with the backend, with basic requests to get and create blogs, and storing them in a MongoDB database. I then implemented some basic tests, such as whether the correct blogs would be returned by the API, using the the “jest” framework. I then implemented the PUT and DELETE requests to edit and delete blogs respectively.
Anyone can perform a PUT request to update the number of likes, but only the person who shared a blog can delete the entry from the database. To do this, I implemented a “User” collection in the MongoDB database, and implemented methods to return the list of users and allow a new user to register. In order to ensure the user is authenticated, I used JSON Web Tokens to generate a token in the backend, and performing a POST request to the “/login” endpoint with a valid username and password would send the token to the user. They can then add the “Authentication” header with this token to their requests to identify themselves. Finally, I created more tests to test this functionality.
At this stage I had a working API, and it was time to move to the user interface. I started a new React application using “create-react-app”. I then focused on displaying bare-bone elements on the screen, using the axios library to interact with the API and fetching data. For the user authentication, I created a LoginForm component to get the username and password from the user. After performing the POST request to the “/login” endpoint, I store the token in the user’s “localStorage” so that it can be accessed throughout the application. I then used conditional rendering to either display the login form or the form to create a new entry depending on whether the token is present in memory.
Up until now, I’ve been managing most of the states for components in the main App. Although this implementation works fine, it makes the code cluttered and not so easy to read since most of the logic is stored in this single file. I therefore used “redux” to store blogs, notifications and the user authentication token, and moved the state from the App to their respective components. After refactoring the code, it became much easier to read and follow the logic.
At the same time, I was also introduced to end-to-end testing with Cypress. This is an amazing framework that is easy-to-use and very intuitive, allowing to simulate user interactions with the user interface to test the flow of an application. For example, one of the tests I wrote was about checking if a user can login. So I instructed the test environment to navigate to the application’s address, press the login button, type the username and password in the form and submit the form. It then checks that the string “Hi user!” is displayed, meaning the login was successful. Previously, I would perform these steps manually to check that any new lines of code would not break existing functionality, and I found this framework to be a perfect tool to automate testing.
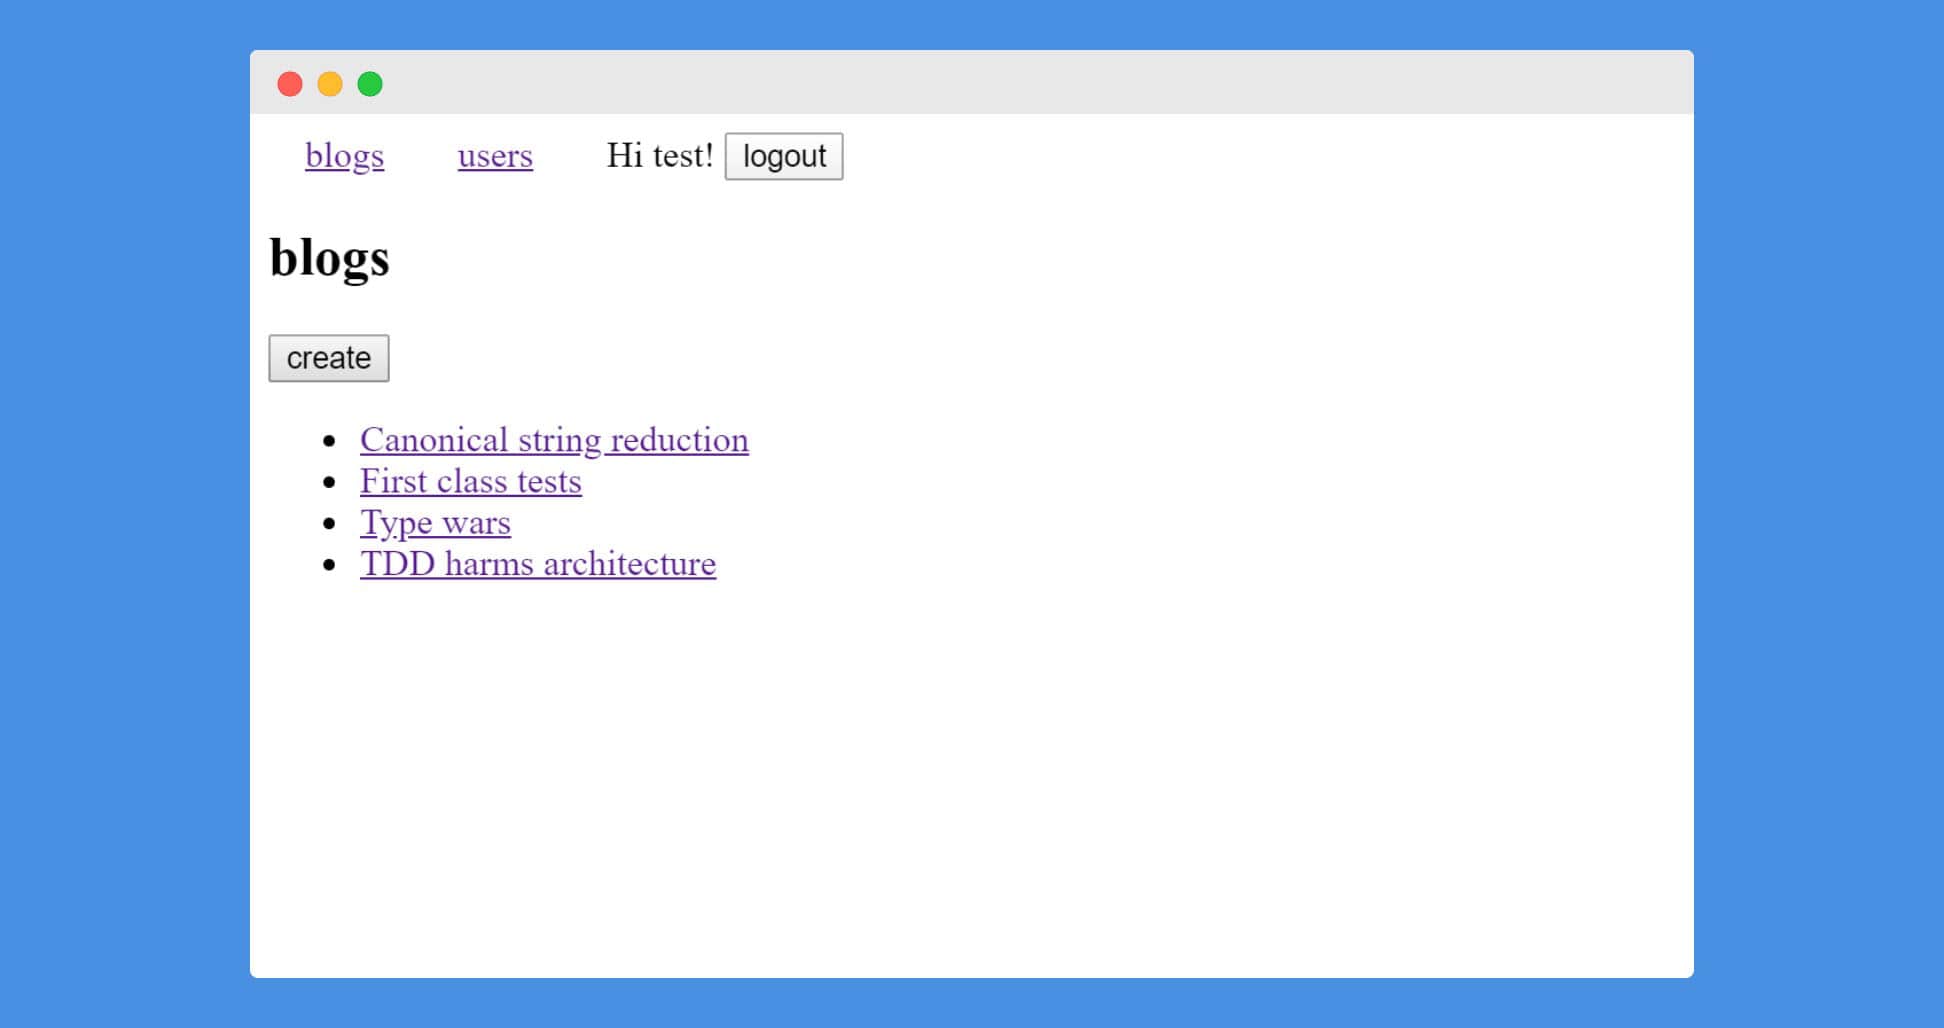
Since all the components were in a single page, the application looked visually cluttered. In order to create different pages I used “react-router” to create different routes, such as a view for listing all the blogs, and a separate view to list all the users. I took this implementation a step further by taking advantage of the “useParams” hook, and create individual views for each blog and user. I added a simple navigation bar at the top for easy access to the different views.
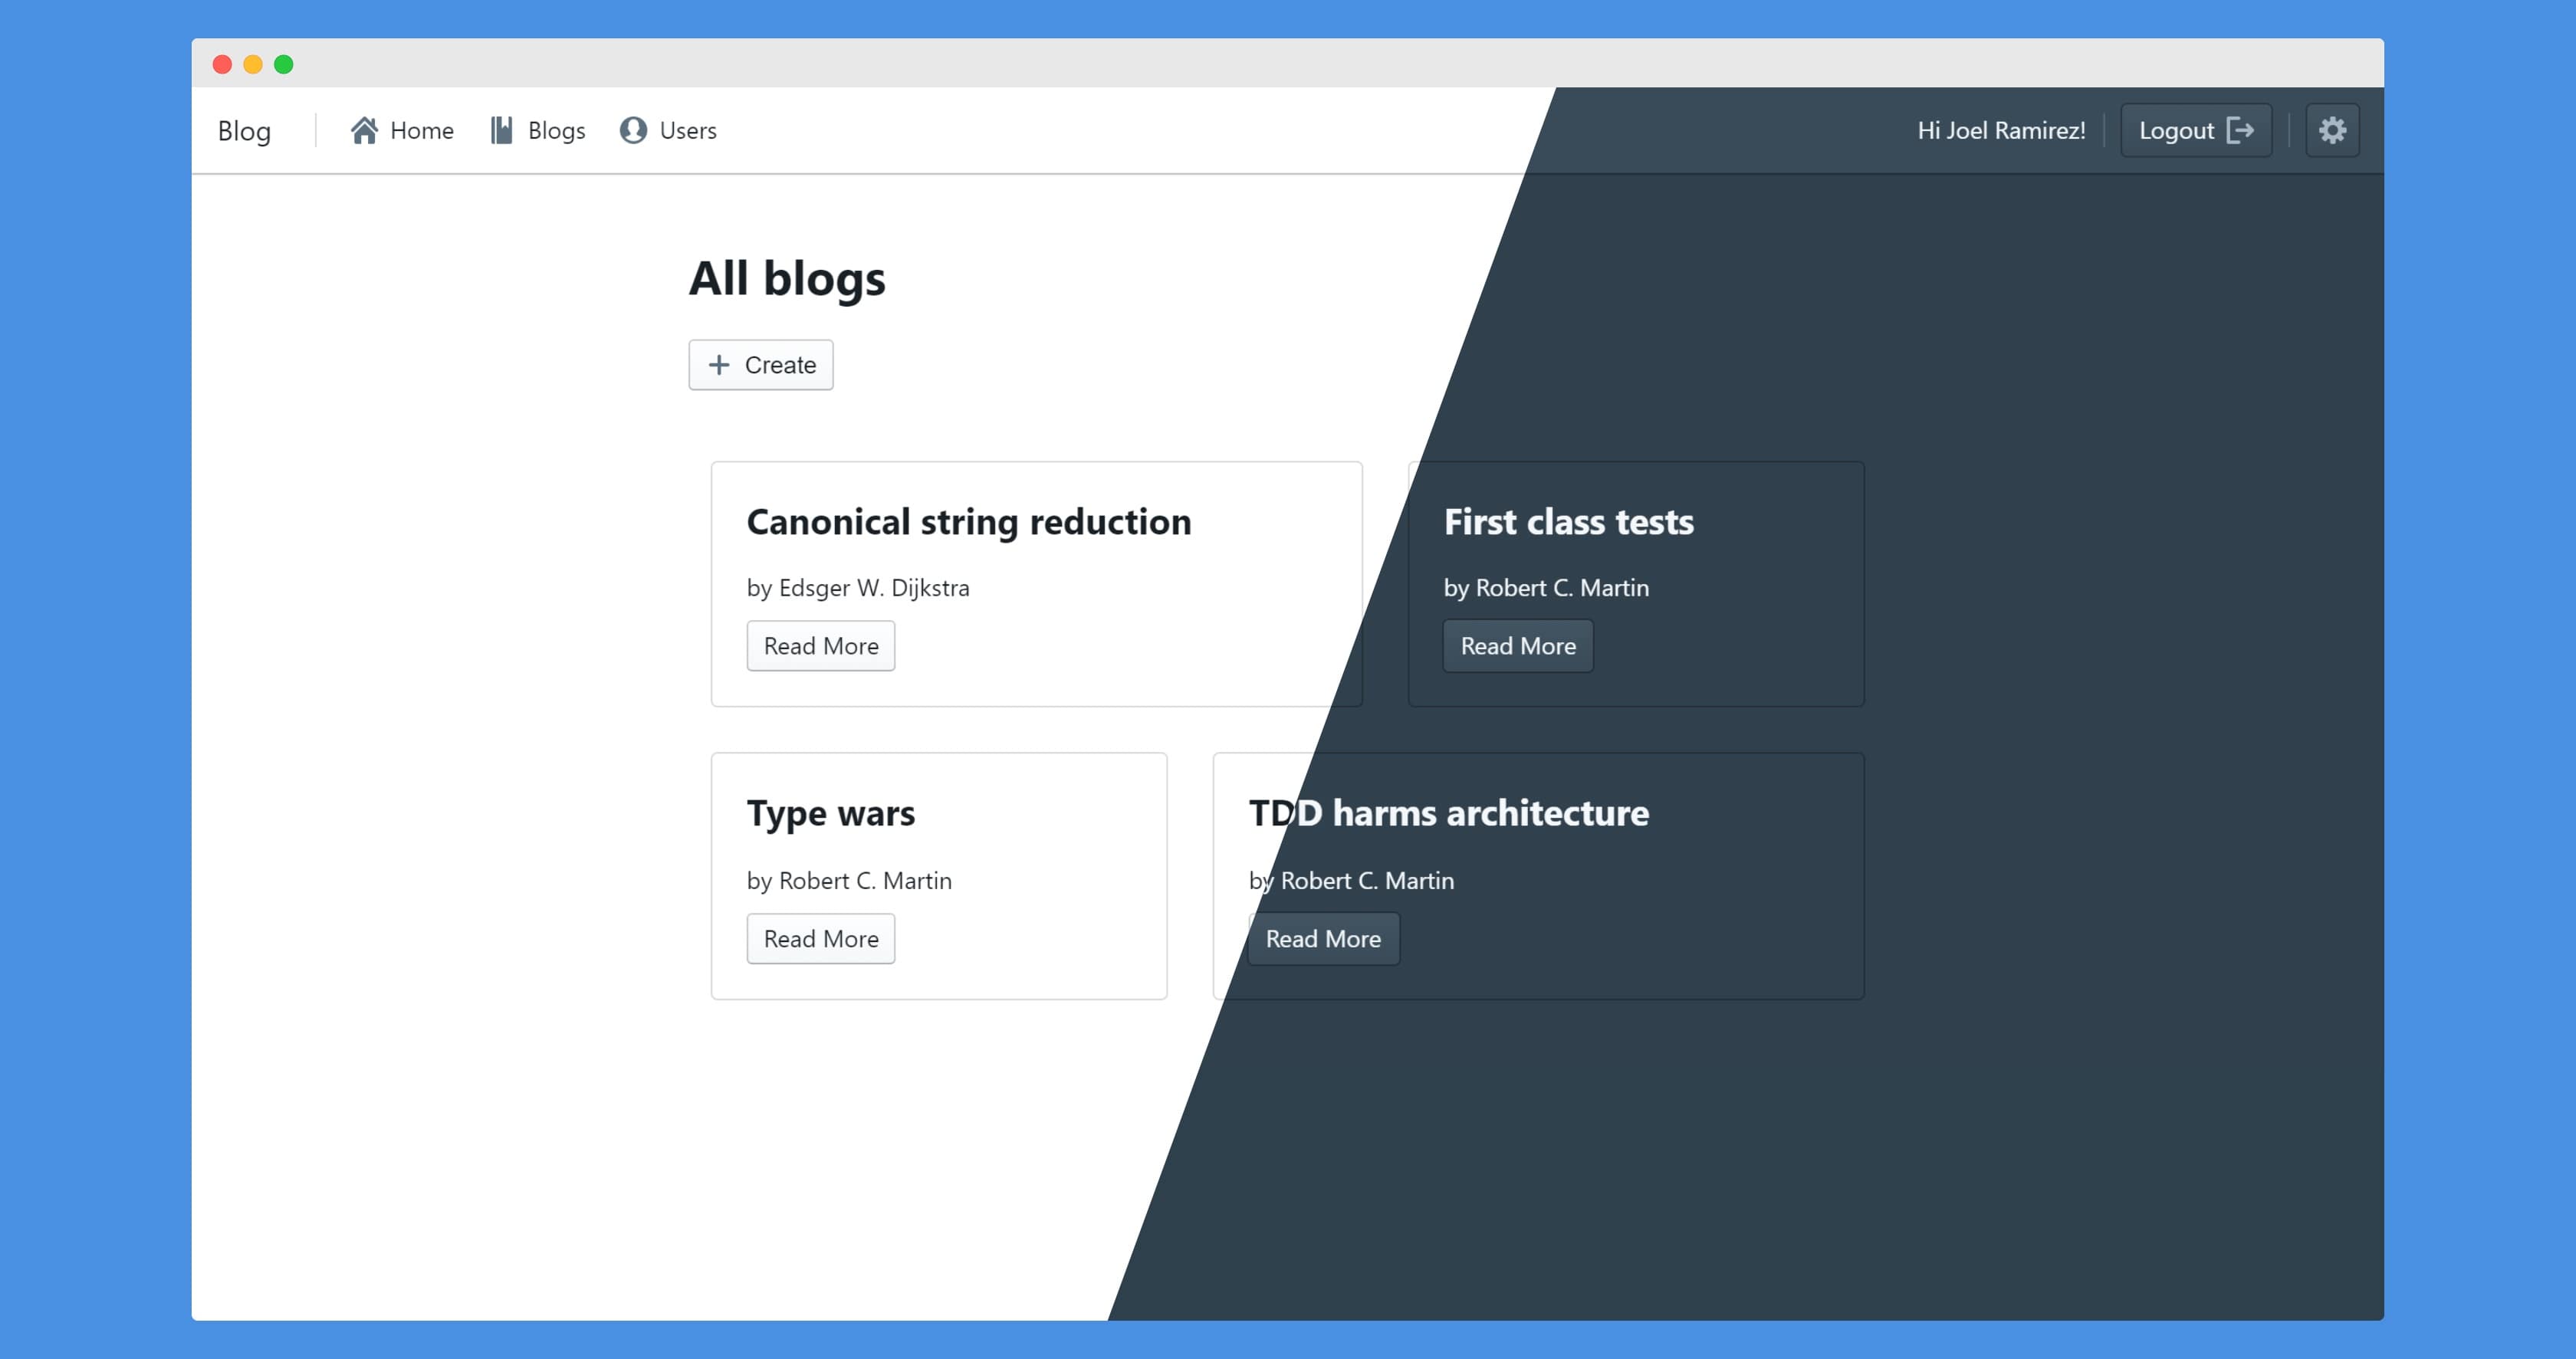
Finally, I used the Blueprint.js library to improve the user interface. This library is well documented and allowed me to quickly develop a nice looking UI with very little effort. One interesting aspect of this framework is the management of notification: previously I had a Notification component that would display the message if it was set in the “redux” store. With blueprint.js this component became redundant, and instead I was able to use a Toaster object, defined in notificationReducer, without having to specify a conditional rendering of this object in React. It automatically shows a Toast notification when a message is dispatched to the store.
After publishing the code to GitHub I wanted to have the project up and running on the cloud so others could try the application without having to manually run the code locally. GitHub easily allows to publish static websites, such as this portfolio, but it can’t deploy Node applications. So instead I signed up to Vercel, and imported both the frontend and backend from GitHub. The frontend was very easy to deploy, all I needed to do is add a now.json file with the environment variable, and Vercel automatically recognized the project as a React application and deployed it instantly. The backend however needed some more work. I had to manually set the environment to “now-server” and redirect requests from all paths to the index.js file in addition to the environment variables. After this vercel recognized the project and deployed the API to the cloud.
This project was a great introduction to React and it covered many important aspects of this library. It also covered a new type of testing, end-to-end testing, which I would previously do manually. I used MongoDB to store data persistently through the mongoose library, and I learned about deploying to production using Vercel and also set up a workflow to re-deploy applications with the latest changes whenever a new commit is pushed to the GitHub repository.